Pages

Monday, December 1, 2014

Christmas Giveaway

Christmas is a time for giving (and for some, shameless self-promotion!) so I'm hosting a little festive Giveaway from today through to December 10th.

To celebrate the opening of my Folksy Shop

Find Me On Folksy

I'm giving away this stocking full of Lazy Crafternoons goodies.


The rules are simple all you have to do is follow me on instagram (ChrisMakesThings) or Twitter (@ChrisWhoMakes) and share your holiday spirit with me any way you like using #LCXmasGiveaway

Repost and Retweet the image above, show me what you are making or tell me what is on the top of your Christmas list this year!

A winner will be drawn at 7pm GMT on December 10th - enter as many times as you like! I'll do my best to ship to my winner no matter where you live, but if you live in a place that hates contests or you are so far you may not receive your post by Christmas then please only enter if you are patient!

Sunday, November 16, 2014

Back to London

After many years away, the call of London proved too strong and at the start of October we found ourselves picking up our sticks and moving back to the big smoke. I had a wonderful three years in Bristol, and will always love Bristol as my first home-across-the-pond, but when the right opportunities presented themselves we decided it was time for us to do London again.

It's a very strange feeling to leave somewhere that feels like home and return to another place that was once home. This move was both a departure and a homecoming.

In the spirit of London life which is as hustling, bustling and busy as I remember it, I'm posting an efficiently quick and easy update to the blog. Now I know instagram photos do not a blog post make, but I thought it would be a nice and easy way to catch up on things to share what I've been up to and encourage readers to follow me on instagram.

Just a few shots from my first month back in town.

A photo posted by Chris Webb (@chrismakesthings) on

In reality, not much has changed in London. It's still the same place and it still excites and exhausts me in the same old ways... the one thing that's changed in the six years I've been away is the rise of apps and their impact on the efficiency of urban life. We can document our lives through apps, find places to eat, find things to do, book taxis and generally explore the city with more efficiency and less need to speak to the people around us than ever - how strange and (and in odd way) wonderfully London.

More updates to come soon, with lots of new things to share and changes coming to my world of crafternoons.

Tuesday, September 2, 2014

Written in the stars - Part 2

Now the time has come for the big reveal of my "Written in the Stars" quilt which I posted about last week. It was such a challenging project for me because it brought in some new techniques that I had probably not practiced or mastered enough to start working with! I went from practising one basic new york beauty block, to drawing my own and adapting it to place one of my stars in the middle.

Starting the New York Beauty inspired block

To make matters more complicated I also decided that I wanted inset the block into the piano-key border I set out around the edge of the quilt... and I just about managed it. Sewing with curves in Patchwork is not that new to me, but what I've never done is quilted a patchwork with curves in it.  It was not too much of a struggle to get the patchwork together, but as I quilted through this block the fabric behaved in all kinds of strange ways I'd never expected... pulling and stretching in odd places, and resulting in much unpicking.

New York Beauty with inset start and inset into border of the quilt.

With a few cheats, I just about managed it but I will have to be more patient with curves the next time I tackle them.

I quilted using tight parallel straight lines running across the quilt and tracing some of the stars, and then filled the remaining space with randomly angled intersecting lines.  Not my neatest quilting job, but I was happy with the overall effect.


And for the finished product? My hope is that you'll be inspired by the quilt, but forgive my photo composition! Sadly, I live in a small urban flat and don't have fields of wheat or rolling green hills to use as a backdrop for my quilts: Instead you get a crowded floor space between an ikea desk and a laundry rack and my very dingy garden!

But here it is:


And my wonderful friend (of 10 years now!) showing it off her gift.  Not the greatest photo, but I hope it shows off the overall look. The lighting makes the puckering look a bit worse than it was, but it does at least show off the mix of textures between the tight straight line quilting and the more random lines that run through the rest of the quilt. Plus the smile on her face is the most important thing to me!


Excited to see what the next 10 years brings our way!

Saturday, August 23, 2014

Written in the stars - Part 1

In follow up to my always secret crafting post the "big reveal" on my most recent project has now come and gone, but because I haven't had a chance to blog-as-I-quilt, I thought I'd just post a little teaser with the online reveal to follow shortly.  So this will be part one of a two-part-post - I promise not to drag it on too long! Remember: good things come to those who wait.

The gift quilt I've been working on came about as a way to celebrate a 10-year "friendiversary"with one of my best pals.  We met at uni when fate rolled the dice and we ended up working in offices next to one another and we became friends in July 2004 when, barely knowing each other, we ended up travelling to and sharing a tent at Hillside Music Festival in Guelph, Canada.

This first friendezvous came about somewhat unplanned, and we awkwardly shared a tent and shivered through the weekend's unexpectedly cold nights, while enjoying food, good music, and a few workshops each day. The rest was written in the stars.

Nine months later we moved to different cities and have never since lived in the same place (or for that matter the same country). Despite this distance we've sustained the friendship, via emails, skype, visits and meeting up in a host of amazing places. So as our 10 year friendiversary approached, I knew I had to find a way to mark the occasion!

Thinking about the theme of "written in the stars" I knew I wanted to create a constellation themed quilt using paper pieced stars and an adapted new york beauty block. I wanted to weave in lots of hidden stories and themes related to our friendship, but I struggled with finding a way to tell the story through the quilt so despite starting work on it with this initial star block in March 2012, the project sat on the back burner until I had my lightbulb moment earlier this year.

My first attempt at a star block.
The slow and sluggish thought process that went on over two years on the back-burner of my mind went something like this:

I love the star and definitely want to work with stars...
... but what can I do with stars, how can I arrange them?
Hmmm.. constellations, I could make it a constellation quilt...
... I wonder if there is a constellation of a unicorn? (we share a joke/affirmation about unicorns) *rushes to google*... Oh yes! There is a monoceros constellation...

"Sidney Hall - Urania's Mirror - Monoceros, Canis Minor, and Atelier Typographique" by Sidney Hall
... but what do I do with this now... and how do I work in the rest of the stories... Am I taking on too much? Can I really tell a story in a quilt?... *excited but totally overwhelmed*

Then one day it hit me: I had reached a point where I knew I wanted to lay out the constellation across the main body of the quilt and had chosen Dan Bennett's Premier Lord collection as my fabrics for the stars... but I was struggling to find fabric in the right deep and dark blue tones to form the contrasting background which I wanted to be the sky. I even searched for constellation fabrics, but struggled to find the right balance of dark, muted blues that I wanted.

So I decided to take the plunge and make my own fabrics via Spoonflower! This allowed me to challenge myself to do some design work and get exactly what I wanted, in the right colours, and gave me a way to literally sew the story of our friendship into the fabric of the quilt.

I designed a pattern of constellations inspired by our friendship, the things we love and the places we have been together and had them printed in three different shades of blue. I also used the placement of the stars in this constellation design, to create a secondary connected constellation fabric (now for sale on Spoonflower!) where the stars were all joined together differently to create a geo-metric fabric.

Here are the three main fabrics:


Here I'm piecing my fabrics alongside Dan Bennett's fabrics


Here you can see the supplementary connected constellation fabric bringing in a geo-metric design that breaks up the more graphic designs of the other fabrics.


And here is your sneak-peek taste of the quilt - my first completed star block ready to go into the quilt. 


I was really happy with the contrast of the colours I'd chosen to print my fabrics in and felt that the designs I made and the scale I printed them at worked really well to achieve the look I was going for.  I wanted the stars to stand out against a very blue background, but didn't want that background to be flat or dull... I think these fabrics work just right to give a defined but not lacklustre backdrop for the stars which are the real focus of the quilt.

 Part two is coming soon!
Wednesday, August 6, 2014

always secret crafting

Here we go again, I'm writing one of many secret crafting blog posts, only this time I'm writing before the big reveal.

When you quilt, you constantly come up against a tension between the traditional and modern, and although it's a tension I love to embrace and explore in my work, when it comes to quilting and blogging, the tension is quite hard to balance.  Bloggers need things to blog about, but very special, long-term projects don't produce the kind of exciting tidbits and progress updates that suit a blog. Inside you are dying to share all those little things and anecdotes about your work, but because you are working on a gift it is all top secret!

It can also be very hard to remember to share my many thoughts and ideas when I'm working hard and purposefully keeping my head down so as not to arise the suspicion of the soon-to-be recipient of the project I am working on.

So without giving it all away, I've been busy working on a very special project the last few months. Really it is a project that has been 10 years in the making, but I've only been properly working out my ideas in the last six months.

The project has been a tough one that has introduced a few new things into my repertoire:

1. Mastering curves (yikes!)
2. Completing some New York Beauty blocks (double yikes!!)
3. Designing my own fabric (what the what!?!)

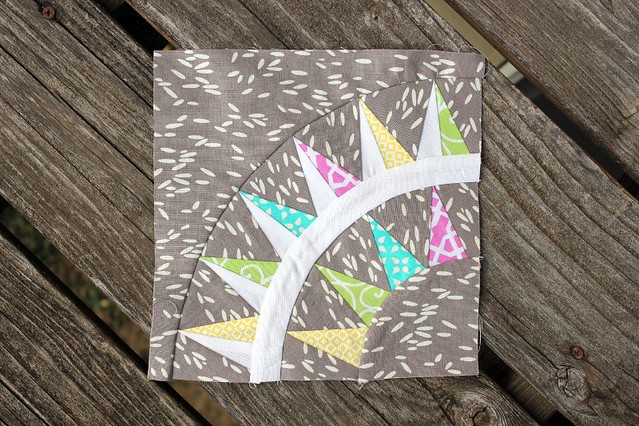
Am I up to the challenge? A new york beauty piece from Canoe Ridge Creations
Number three really hits the "traditional meets modern" nail on the head. Get me - I've had a go and digital fabric design! I've designed with illustrator before with my own laser-cut patterns for my Bristol Cityscape coasters and mobile designs, but I felt very overwhelmed at the task of taking my skills further design fabrics.


Fabrics are so much more layered, colourful and complex than simple line drawings, but to ease myself into it, I kept it simple - using my experience with line design to draw some constellations and create some custom fabric. I am desperate to show it off to on the blog, but the design would be a dead giveaway for the person I am creating the quilt for, so for now I'm going to have to be a textual tease.

I ordered my fabric through Spoonflower, but have since discovered that there is a range of fabric printers here in the uk: check out these listings at the Sewing Directory.

Have you designed your own and had any fab or tragic experiences? If yes, I would love to hear about them. Comment or drop me a line or two and I'll work them into my "big reveal" post which should be coming in about two-weeks time!


Monday, June 9, 2014

Craft fuel: Coffee - DIY Nespresso Capsule Holder

It's been a very long time since I did a 'craft fuel' post and as I write this it has occurred to me how strange it is I have never posted about the most important craft fuel of all: coffee.

Those who know me well (and anyone else who has seen me before 8:30 on any given morning) know that coffee is a big part of my life. I'll admit it is not the healthiest part of my daily routine, but given that it is my only true vice I give myself a pass and allow myself to indulge in a few cups a day.

Sometimes I have a treat with it, some cake or a nice piece of dark chocolate, but even on it's own it is a delightful little indulgence and comes with a perfect little pick me up that when tempered correctly lends a bit of oomph and focus to my crafting.

Now I've been through all the coffee machines out there: I have my toddy for deliciously smooth iced coffees in the summer, I have a siphon for a strong but sweet brew and more recently I set myself up with a Nespresso Machine so that I can enjoy the full range of lattes, cappuccinos and on my last rockstar-of-a-new-year's-eve: boozy frangelico macchiatos!

I love my machine, so much that I've upgraded to a 'Latissima' and at my old job I conspired with colleagues to establish an at-work machine as well. As much as I love the sweet brown nectar that flows from those capsules, I've always been foiled when it comes to storing them. Yes, there are boxes and racks and containers and lovely glass jars out there designed for them but they all come at a high price and none of them have ever really appealed to me that much, so I set out to make my own. Check it out:

DIY Nespresso Capsule Holder

Materials:
- 7 strips of balsa wood (15mm x 5mm)
- thick double-sided foam tape
- magnetic tape
- 1 magnetic note board (IKEA)
- washi tape for decorating

Here's how I did it:

Testing my layout and cut balsa to size with craft knife.
Trimming magnetic tape to 1/2 width.
Attaching magnet strip to wood with double sided tape. 
Cover each strip with Washi Tape
Assemble, and Ta-da!

The capsule holder in situ at my coffee corner.
Mmmm double latte!

So there it is. After a long time of juggling with capsules, I've made my own capsule holder. The nice thing is that it was very cheap (all materials under £15), and it is completely changeable! I can create a new layout or change the colour of my washi tape and create a new look whenever I want... but for now, I'll just admire it while I sip my coffee.


Tuesday, April 1, 2014

Creative inspiration: Ken Stradling Collection

As a part of my resolution to get back to blogging, I'm hoping to document some of the creative places I come across in hopes that I might share a bit of what gets me inspired! Last weekend I found a little creative refuge in Bristol when I attended the opening of the Ken Stradling Collection, a new collection and study library that is now open to the public every Wednesday in Bristol.

A new (but seasoned) addition to the Bristol design scene

With links to his professional history with the Bristol Guild, Ken Stradling has built up a very personal collection of 20th and 21st century ceramics, furniture, glass and more.  Now with thanks to Heritage Lottery Funding and the Gane Trust this remarkable private collection is open to the public.

Tucked away on Park Row, this eclectic collection is displayed over three floors. Because it is so varied, with everything from large pieces of original furniture to charming little one-of-kind ceramic works, the collection will appeal to a broad range of visitors. From designophiles to one-off browsers, the collection boasts plenty of design eye-candy for everyone... and if the objects aren't enough, it also hosts a design study centre for visitors to pursue their interests further.

My fellow opening attendees - getting serious about design 
A busy opening!

Though Ken Stradling has been collecting since the late 1940s, the collection is very much in its infancy as a display. It is refreshing to see that there is room for such interesting and personal collections in the Bristol scene and though the works on display are so varied, his passion for design visibly ties them all together.  I expect that this very personal angle will make the collection accessible to a wide range of people, from those unaware that home design has a fascinating story to seasoned design aficionados whose work has shaped the history reflected in the collections.

The photos show off the wonderful range of the collection:


The collection promises to display a regularly changing selection of work and also boasts a digital catalogue of significant items on their website. You can now visit the Ken Stradling Collection Wednesdays from 10 until 4, at 48 Park Row in Bristol... do pop in and check it out!

Thursday, January 30, 2014

on to new things!

I'm not sure if you noticed, but there was a bit of a post '52 weeks 52 crafts' lull here at Lazy Crafternoons. I have been quite busy behind the scenes, but my 2012 challenge must have really knackered my blogging skills because 2013 was consequentially quite a quiet one in my little corner of the world wide weberverse.

2014 will be all about balance for me. Trying to find a way to juggle my craft life and work life (a new full time job at the end of 2012 may or may not have also been keeping me quite busy). 

Total blog posts in 2012: 79
Total blog posts in 2013: 1

I'll aim for something in the middle this year. Hoping to post more patterns, updates, and pieces on what inspires me to get crafting. I think 40 posts is reasonable, don't you?

In the mean time I'll post a few pictures of the projects I have been working on quietly this past year. A few major projects including two quilts: one for my friend's wonderful summer wedding (which I had the joy and privilege of officiating!) and another for my beautiful newborn niece in Canada.

Wedding Quilt.


I made this using some very bold fabrics from Tula Pink (Birds and the Bees collection). If you look closely, it starts with 1 inch half-square triangles in the middle and then the squares gradually increase, doubling in size towards the edges of the quilt until pieces make up 8 inch squares.  I like the way the fabrics draw inspiration from nature, with bold coloured fabrics which subtly work birds and bees in the patterns - both classic and modern, ordered and chaotic! Sort of the perfect fabric for my good friends who are getting married: bright and cheerful, outrageous and also structured - I knew it was the right choice for the project.  I didn't want to dilute the bright fabrics with other collections or solids and pale fabrics, so I chose a pattern that matched what I liked about the fabric. A patchwork that is seemingly unstructured, but when you look closely is actually quite orderly.

* * * *

Canadian Wild quilt.


I made this quilt using a mix of jewel and autumnal toned fabrics... and it represents my first foray into paper piecing. The quilt features Canadian animals, starting with a stag pattern in the middle which I bought and downloaded on Etsy and then using my experience piecing that together, I gradually drew my own paper piecing patterns to create the goose, beaver, racoon, fox, moose and bear.

* * * *

I've also had some smaller projects on the go and have started selling some small quilts and projects in my own Etsy shop, so go ahead and check those out.  

I'll be posting some new tutorials, tips and ideas soon! Happy (belated) New Year!